Setting Up a WiFi Extender with an Ethernet Connection
Do you ever find yourself yearning for a stronger WiFi signal in certain corners of your home? Smartphones sputtering, laptops lagging – it can be incredibly frustrating. Thankfully, WiFi extenders offer a solution, but did you know some extenders offer the best of both worlds: boosted wireless signal and wired connectivity?
This article will guide you through setting up a WiFi extender with an ethernet port, giving you the power to extend your network’s reach and provide rock-solid connections for devices that need it most.
Gearing Up for Success
Before diving in, here’s what you’ll need:
Finding the Sweet Spot
Now, let’s position your extender for optimal performance:
Power Up and Choose Your Connection Method
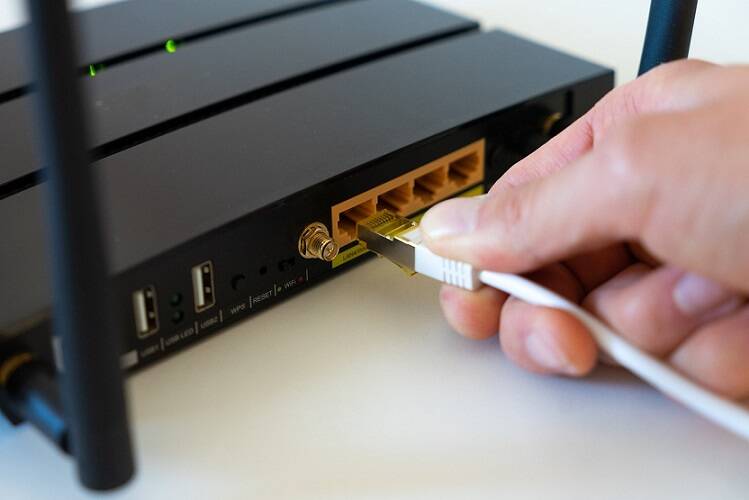
1. Plug It In: Connect your extender to a power outlet near your chosen location.
2. Wired or Wireless Setup: Most extenders offer two options:
- Wireless Setup: If running a cable isn’t feasible, you can do a wireless setup. Consult your extender’s manual for specific instructions, but it typically involves connecting to a temporary WiFi network created by the extender during setup.
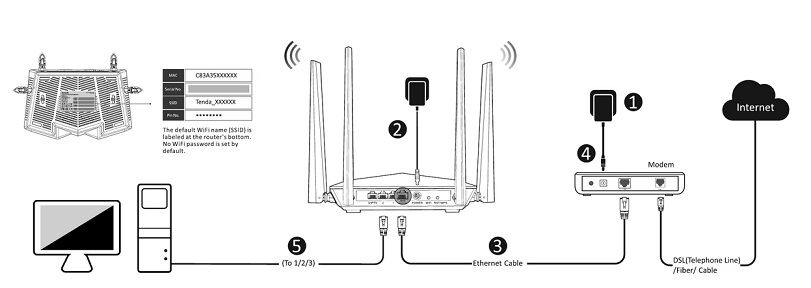
- Wired Setup (Recommended): This is the most reliable method. Run an ethernet cable from a free ethernet port on your router to the ethernet port on your extender
Accessing the Extender’s Control Panel
1. Open a Web Browser: Grab your computer, phone, or tablet and launch a web browser.
2. Find the Extender’s Address: Refer to your extender’s manual for the specific web address (often something like “extender.local” or an IP address). You might also need a default username and password (also found in the manual).
Connecting to Your Router’s WiFi
1.Locate Your Router’s Network: Within the extender’s settings, search for available WiFi networks.
2. Connect to Your Router: Choose the SSID (network name) of your main router and enter the WiFi password.
Examples of strong Passwords
1.Tranquil_1stSymphony$
2. Evening#Cashew20!
3. Wanderlust*BlueMoon
Configuring Your Extended Network (Optional)
1. A Separate Network (Optional): You can create a separate WiFi network name (SSID) and password for the extended network broadcast by the extender. This can be useful for managing devices connected to the extender separately.
Enjoy the Fruits of Your Labor!
Congratulations! Once the setup is complete, your devices should automatically connect to the stronger WiFi signal provided by the extender. Devices that require a wired connection can now be plugged directly into the extender’s ethernet port for a stable and reliable connection.
Pro Tips for Optimal Performance
Match Your Bands: Ensure your extender and router are on the same WiFi band (2.4 GHz or 5 GHz) for optimal performance.
Troubleshooting Tips: If you encounter any issues, consult your extender’s manual or the manufacturer’s website for troubleshooting steps.
By following these steps, you’ll be well on your way to eliminating WiFi dead zones and experiencing a stronger, more reliable wireless network throughout your home. Also, ensure you always have a secure connection in your home network.
Frequently Asked Questions (FAQ)
Q: What are the benefits of using a wired extender setup?
A: A wired setup offers a more stable and reliable connection compared to a wireless setup, which can be susceptible to interference.
Q: Can I use any ethernet cable to connect my extender?
A: Most standard ethernet cables will work. If you’re unsure about cable compatibility, consult your extender’s manual.
Q: I don’t see an ethernet port on my extender. Does this guide still apply?
A: This guide applies specifically to extenders with ethernet ports. If your extender doesn’t have one, you can still set it up using a wireless connection method as described in the steps above. Refer to your extender’s manual for specific instructions.
Q: Why would I want to create a separate SSID for my extended network?
A: Creating a separate SSID allows you to manage devices connected to the extender independently. For instance, you can set different parental control settings or prioritize bandwidth allocation for specific devices on the extended network.
Certain content that appears on this site comes from Amazon. As an Amazon Associate, we earn from qualifying purchases. Read the full Disclaimer Here!